To apply graphite to a pinewood derby car, start by sanding the entire car down with medium-grit sandpaper. Next, rub a piece of graphite along all of the edges of the car. Be sure to get into all of the nooks and crannies.
Finally, use a soft cloth to buff the graphite into the wood.
- First, sand the entire car with medium-grit sandpaper until it is smooth
- Next, apply a layer of graphite to the car with a soft cloth
- Use your hands to rub the graphite into all of the nooks and crannies on the car
- Once the entire car is covered in graphite, use a dry cloth to wipe away any excess powder
How to Add Graphite to your PineWood Derby Car
How to Assemble Pinewood Derby Car
Building a Pinewood Derby car is a great way to spend some quality time with your child and create a fun keepsake that can be enjoyed for years to come. The first step is to gather all of the necessary materials. You will need:
-A block of pinewood (available at most hardware stores)
-A hand saw or power drill
-Paint or other decorations
-Wheels (available at most hobby stores)
-Axles (available at most hobby stores)
-Weight (optional, available at most hardware stores)
Once you have all of your materials, it’s time to get started! The first step is to cut the block of wood into the desired shape. If you are using a hand saw, be sure to use slow, even strokes and avoid splintering the wood.
Once the block is cut to size, it’s time to drill holes for the axles. Again, take care not to splinter the wood as you drill.
Now it’s time for painting or decorating!
This is where you can really let your creativity shine. Once the paint is dry, it’s time to attach the wheels and axles. Be sure that the wheels are facing outward before attaching them securely with screws or nails.
The final step is optional, but if you want your car to be extra fast, you can add weight by attaching washers or lead fishing weights to the bottom of the car.
And that’s it! Your Pinewood Derby car is now ready for racing!
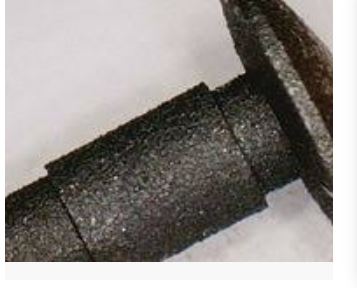
Putting Axles in Pinewood Derby Car
Building a pinewood derby car is a fun project that you can do with your kids. It’s also a great way to teach them about physics and how to apply it to real life. One of the most important parts of the car is the axles.
Here are some tips on how to put axles in your pinewood derby car.
The first step is to find the right axles for your car. You can buy pre-made axles or make your own from scratch.
If you’re making your own, you’ll need to drill two holes into the body of your car, one for each axle. The holes should be just big enough for the axles to fit snugly.
Once you have your holes drilled, it’s time to install the axles.
Put a small drop of lubricant on each axle and insert it into the hole. Make sure that the axle is level and perpendicular to the body of the car before you glue it in place. Once both axles are installed, you’re ready to add wheels and race!
Pinewood Derby Oil Vs Graphite
The Pinewood Derby is a Cub Scout racing event in which participants build their own cars from a block of wood in the shape of a derby car. The cars are then race down a track.
There are two main types of lubricants that can be used on the cars: oil and graphite.
Each has its own advantages and disadvantages.
Oil is the traditional lubricant for Pinewood Derby cars. It is easy to apply and provides good friction reduction.
However, oil can make the car’s wheels less grippy, which can lead to slower times. Oil also tends to attract dirt and dust, which can build up on the car over time and impact its performance.
Graphite is newer lubricant option for Pinewood Derby cars.
It provides excellent friction reduction while still allowing the wheels to grip the track well. Graphite is also much less likely to attract dirt and dust than oil, making it easier to keep your car clean and running fast.
Pinewood Derby Car Designs
The Pinewood Derby is a Cub Scout tradition in which scouts build miniature cars from kits containing a block of wood, plastic wheels, and metal axles. The cars are then raced down a track.
There are many different ways to design a Pinewood Derby car.
Some people like to keep it simple, while others go all out with intricate paint jobs and creative designs. No matter what your approach, there are a few things to keep in mind when designing your car.
First, consider the dimensions of the block of wood.
It is important to make sure that your car is not too wide or too long, as this will impact how well it runs down the track. Second, think about how you want to attach the wheels to the axles. There are several different methods available, so be sure to choose one that will work well for your particular design.
Finally, don’t forget about weight! Adding weight to your car can help it go faster, but be careful not to add too much or it may not run at all.
With these guidelines in mind, you’re ready to start designing your own Pinewood Derby car!
Be creative and have fun with it – after all, that’s what the race is all about.
Pinewood Derby Rules
The Pinewood Derby is a racing event for Cub Scouts. It is held annually, usually in January or February. The race is run on a track with four lanes and each lane is about 5 feet long.
The cars are made from a block of pine wood that is 3 inches wide, 4-1/2 inches long, and 1-3/4 inches thick.
Most Cub Scout packs in the United States use the same set of rules developed by the Boy Scouts of America (BSA). These rules are designed to promote good sportsmanship and fair competition.
There are three main parts to the Pinewood Derby: building the car, weighing the car, and racing the car.
Building the Car:
Each boy must build his own car from scratch using only materials provided in an official Pinewood Derby kit purchased from the Cub Scout store or online retailer.
No help from parents or other adults is allowed, though boys can get advice from their brothers, sisters, friends, etc.
The first step is to cut out the body of the car from the block of wood using only hand tools such as saws, knives, hammers, chisels, etc. Once the body has been cut out, it can be shaped and sanded as desired.
Next, four small nails are used to attach plastic wheels to two axles which have been inserted into pre-drilled holes near either end of the body. Finally,…
Pinewood Derby Car Axle Placement
There are a few things to consider when it comes to placing the axles on your Pinewood Derby car. The first is the weight distribution. You want to make sure that the majority of the weight is towards the rear of the car.
This will help with speed and stability.
Next, you want to think about aerodynamics. The more streamlined your car is, the faster it will go.
Placing the axles close together will help create a more aerodynamic design.
Finally, you need to make sure that the axles are placed in such a way that they do not rub against any part of the body or frame of your car. If they do, it will create friction and drag, which will slow down your car.
With these things in mind, placement of your Pinewood Derby car’s axle can be crucial in achieving maximum speed and performance. Experiment with different positions until you find what works best for your car!
How to Angle Pinewood Derby Wheels
Angling your Pinewood Derby wheels is one of the best ways to improve your car’s performance. By changing the angle of the wheel, you can change the way your car moves down the track.
There are a few different ways to angle your wheels.
The most common way is to use a wheel jig. This is a tool that allows you to hold your wheel at the desired angle while you work on it.
Another way to angle your wheels is to use a Dremel tool or similar rotary tool.
This method is more difficult and requires more precision, but it can be done without a jig.
Once you have angled your wheels, you will need to test them on the track before making any final adjustments. This will help you determine how much effect the new angles have on your car’s performance.
Lemon Pledge Pinewood Derby
The Cub Scout Pinewood Derby is a time-honored tradition. The derby is a race where boys (and girls) get to build their own cars from a block of wood, usually pine. The object is to have the fastest car on the track.
There are many ways to prepare your block of wood for the big race. Some people like to sand it down and paint it with bright colors. Others prefer to leave it natural and varnish it for a shiny finish.
One way to make your car stand out from the rest is to add some Lemon Pledge furniture polish to the varnish. This will give your car a unique flavor that will be sure to catch everyone’s attention!
Credit: www.pinewoodpro.com
How Do You Apply Graphite to Pinewood Derby?
When building a Pinewood Derby car, graphite is often used to lubricate the axles and wheels. This helps the car to move more smoothly and quickly down the track. Applying graphite to your Pinewood Derby car is a simple process that only takes a few minutes.
To start, you will need to gather some supplies including: graphite powder, a small paintbrush or cotton swab, and something to catch any excess graphite (a paper plate works well). Once you have your supplies, follow these steps to apply graphite to your Pinewood Derby car:
1. Begin by lightly sanding the area where you will be applying graphite.
This will help thegraphite adhere better to the surface.
2. Next, dip your brush or cotton swab into the graphite powder and then apply it evenlyto the axle or wheel. Be sure not to put on too much as this can make the car difficultto control.
3. Once you have applied graphite to all of the areas you wish, use a clean brush orswab to remove any excess powder from around the car. Again, be careful not toget anygraphite on other parts of the car as this can cause issues during racing.
4. That’s it!
Your Pinewood Derby car is now ready for action with its new coat ofgraphite!
How Do You Apply Graphite to a Car?
If you’re looking to add a little bit of personal flair to your car, why not try out some graphite? Graphite is a great way to add some unique details to your car without having to spend a lot of money or time. Plus, it’s relatively easy to apply and can be removed if you change your mind later on.
Here’s how you can apply graphite to your car:
1. Decide where you want to apply the graphite. This could be anywhere from the hood or roof of your car, to the side mirrors or even the wheels.
Once you’ve decided on a location, make sure that it’s clean and free of any dirt or debris.
2. Next, use painters tape to create a border around the area where you’ll be applying the graphite. This will help ensure that only the area you want covered gets covered.
3. Now it’s time for the actual application process. Using a foam brush or similar applicator, start applying the graphite in long strokes in one direction. Work slowly and carefully so that you don’t accidentally go outside of the taped border.
4. Once you’re finished applying the graphite, remove the painter’s tape and admire your handiwork! If desired, you can also use a clear coat sealer to help protect your design from weathering or fading over time.
How Do You Apply Graphite Lubricant?
When it comes to graphite lubricant, there are a few different ways that you can apply it. The first way is to simply rub the lubricant onto the desired area. This method is pretty straightforward and doesn’t require any special equipment.
Another way to apply graphite lubricant is by using a spray bottle. This method is a bit more messy, but it can be helpful if you’re trying to cover a larger area. Finally, you can also use a brush to apply the lubricant.
This method is best for getting into small crevices and ensuring an even coverage. Whichever method you choose, make sure that you allow the graphite lubricant to dry completely before using the item again.
Can You Use Graphite on Pinewood Derby Cars?
You can use graphite on Pinewood Derby cars to make them go faster. Graphite is a slick substance that helps reduce friction, and thus makes the car go faster. The best way to apply graphite is to use a pencil or your fingers to rub it onto the axles and wheels of the car.
Be sure to get good coverage and avoid getting any graphite on the body of the car, as this can slow it down.
Conclusion
If you’re looking to give your Pinewood Derby car a competitive edge, consider applying graphite to its wheels. Graphite is a lubricant that will help your car move more smoothly and quickly down the track. Here’s how to apply it:
1. Start by cleaning the wheels of your Pinewood Derby car with soap and water. This will remove any dirt or debris that could prevent the graphite from adhering properly.
2. Once the wheels are clean, dry them off completely.
3. Next, apply a thin layer of graphite to each wheel using a soft cloth or brush. Be sure to cover the entire surface of the wheel, including the axle hole.
4. Allow the graphite to dry for at least an hour before racing.